Note: the LabJack UE9 is no longer produced due to availability of components. You may wish to consider using a different device, especially the LabJack T7 which replaces the UE9.
The LabJack UE9 offers both USB and Ethernet connectivity. So far, we have discussed communicating with LabJacks over USB. To connect to an Ethernet LabJack requires an extra few simple steps as the D# column of a DAQFactory channel only accepts numbers and not IP addresses:
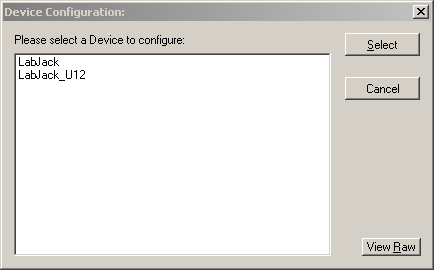
1) Click on Quick - Device Configuration from the DAQFactory main menu. A new window will popup.

2) Select LabJack from the list of available devices. A new window will appear.

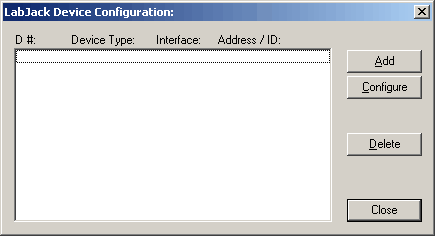
3) Click on the Add button to add a new LabJack device.

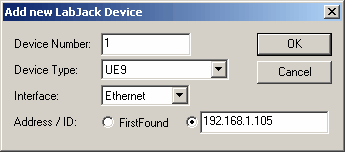
4) In the new window, select a unique device number to assign to this device.
This number should be unique among any other LabJack devices, even USB ones, as this is the number DAQFactory uses to identify the device.
5) Select UE9 and Ethernet interface, and put the IP address of your device in the Address space.
6) Click OK.
The new device will be listed in the window. Depending on your DAQFactory installation, you may see a Configuration button. We do not recommend using this button to configure your LabJack, and it is considered depreciated. Instead, use the techniques described later in this guide.
7) Click OK to close this window.
At this point, the LabJack with the given IP address has now been assigned a device number that you can use everywhere you'd use the LabJack ID in DAQFactory. We have mapped the IP address to a device number. Do not use the LabJack's ID, but the device number instead.